PNG を JPG に変換してファイルサイズを小さくする方法
Anything Tools Editorial
||
6 分で読めます
|画像変換
PNG を JPG に変換してファイルサイズを小さくする方法
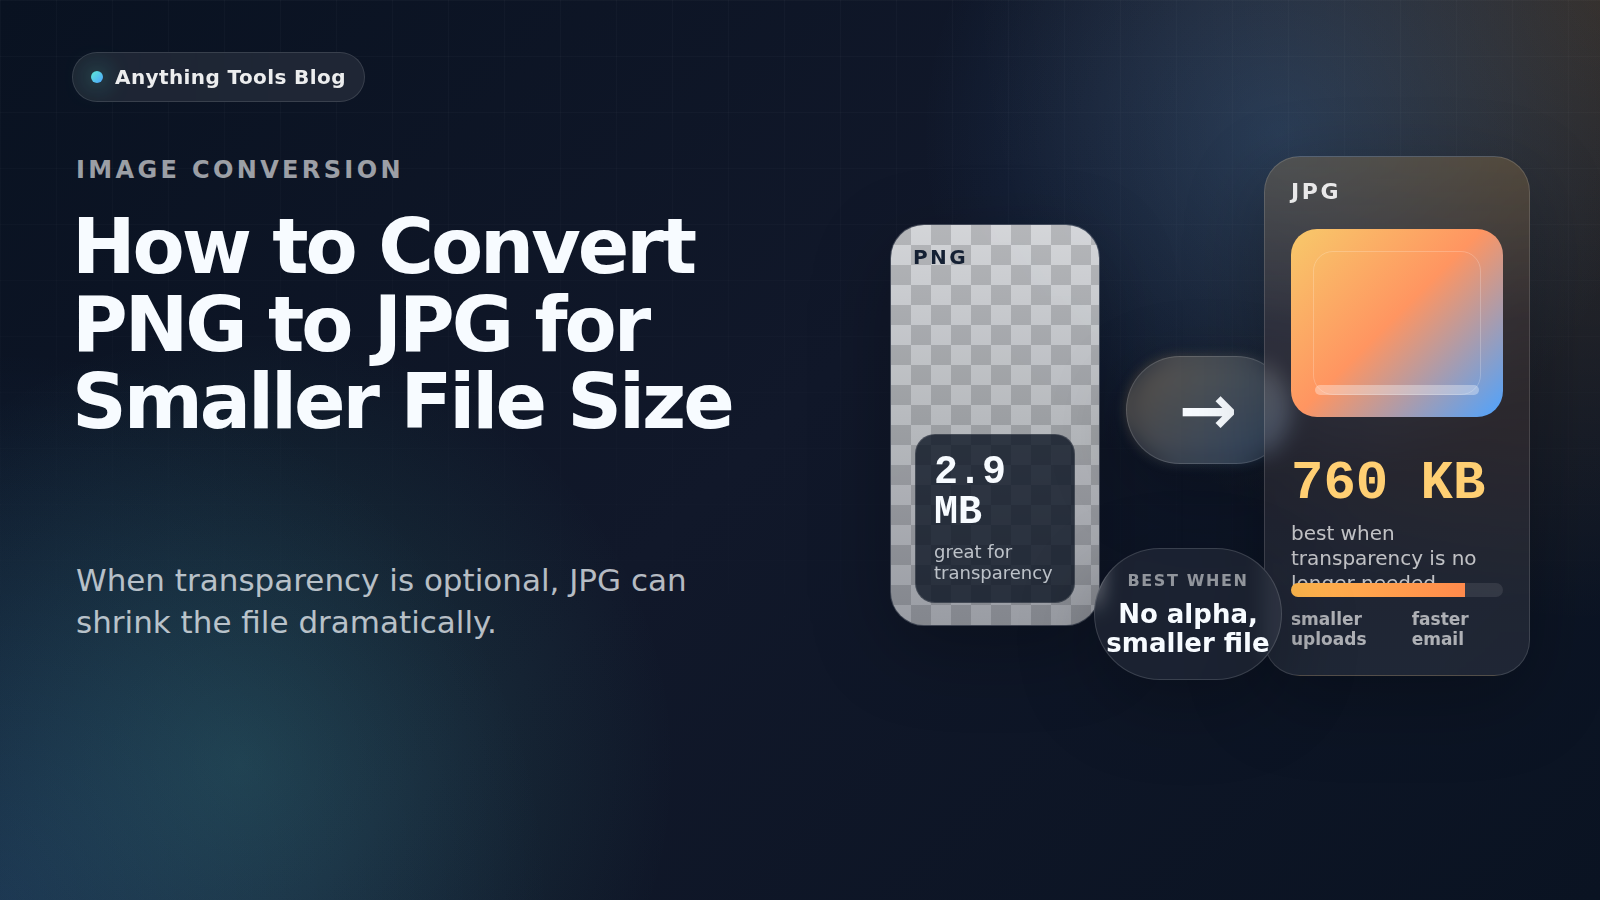
PNG はスクリーンショットやロゴに優れていますが、実際には写真に近い画像で透過が不要なら、容量が大きすぎることがよくあります。
Good candidates for conversion
PNG to JPG works best for photographs, flattened marketing visuals, blog headers, and product images that no longer need transparency.
When not to use JPG
Keep PNG for logos, icons, UI screenshots, tiny text, and any image that still requires transparency. JPG compression can blur edges and create artifacts.
Practical workflow
- Check whether transparency is still needed.
- Resize first with Image Resizer.
- Convert with PNG to JPG.
- Run a second pass in Image Compressor if necessary.
- Review the result at 100% zoom before publishing.
Why the size drop can be large
Design tools often export PNG losslessly. If the image is really a photo, JPG can reduce the size dramatically while keeping the result visually acceptable.
Final takeaway
Convert PNG to JPG when the image behaves like a photo. Keep PNG for transparency, sharp graphics, and text-heavy assets.