How to Convert PNG to JPG for Smaller File Size
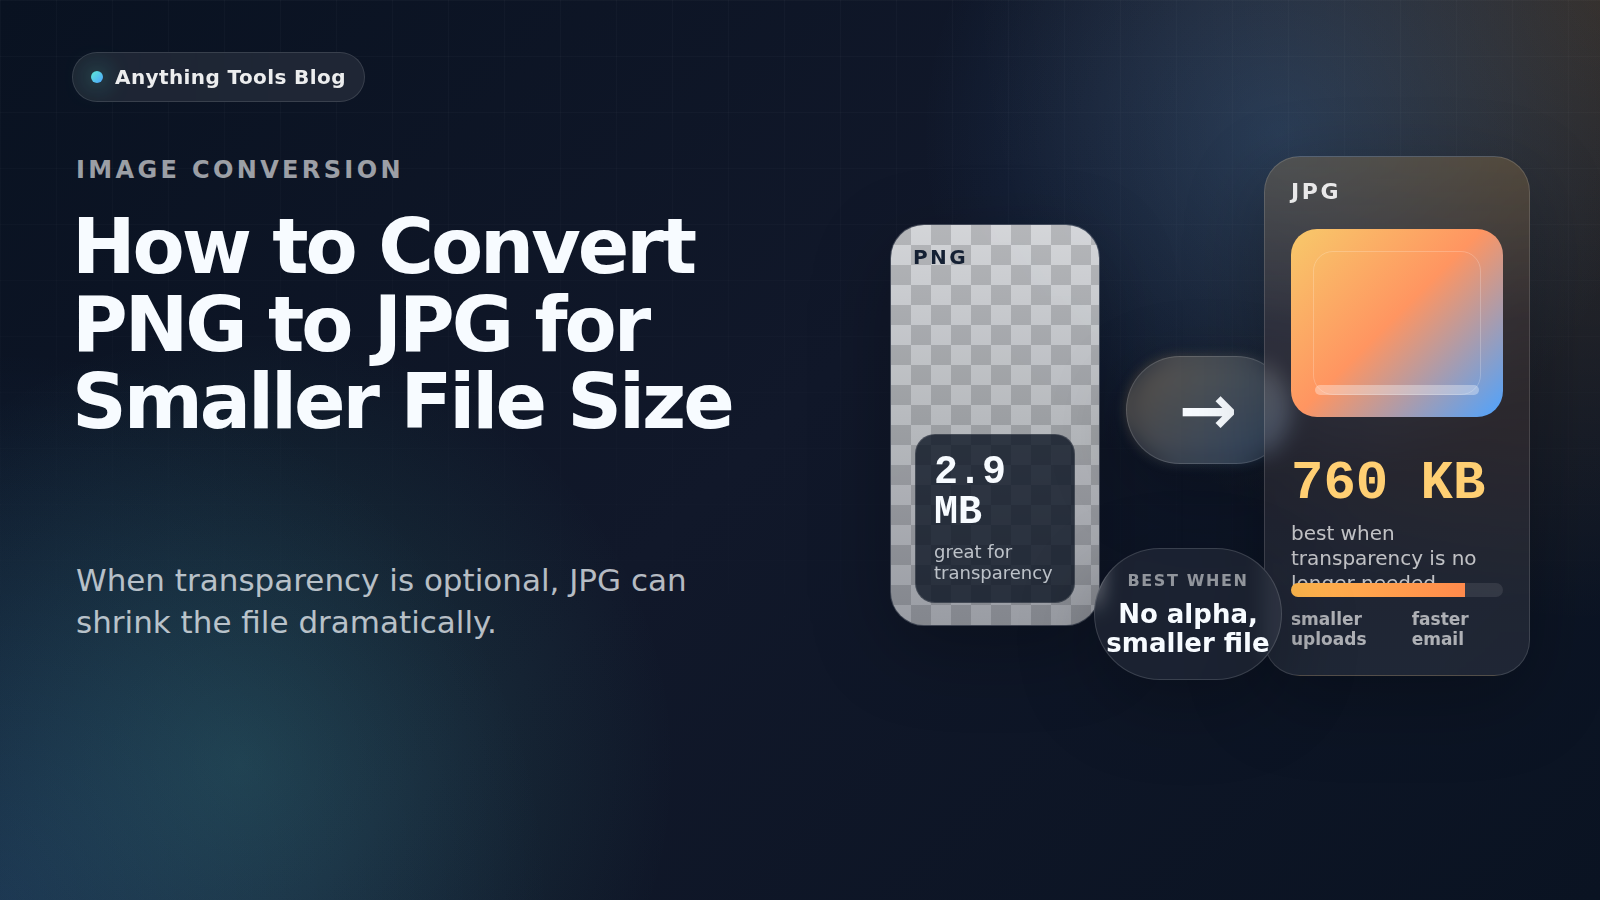
PNG is excellent for screenshots, logos, and graphics with transparency. But when the image is actually a photo—or a flat image that no longer needs transparency—PNG is often much larger than necessary.
Converting PNG to JPG is one of the fastest ways to reduce file size for uploads, blog images, and email attachments. The trick is knowing when to convert and when not to.
When PNG to JPG makes sense
Use JPG when the image is mostly photographic and does not need transparency. Typical good candidates include:
- product photos exported from design tools
- blog header images with no transparent background
- social media visuals flattened onto a solid canvas
- screenshots that no longer need pixel-perfect edges
In these cases, converting with the Image Converter can cut the file size dramatically.
When you should keep PNG
Do not switch to JPG if the image includes:
- transparent background areas
- logos, icons, or line art
- tiny text that must remain crisp
- UI screenshots where sharp edges matter
JPG uses lossy compression. That is perfect for photographs, but it can introduce blur and artifacts around text and graphics.
A simple conversion workflow
- Check whether the image still needs transparency.
- If the file dimensions are too large, shrink them first with the Image Resizer.
- Convert the file with the PNG to JPG converter.
- If needed, run the result through the Image Compressor for a second pass.
- Compare the final JPG visually at 100% zoom before publishing.
How much space can you save?
There is no universal number, but the savings can be substantial. A large photographic PNG may drop from megabytes to a few hundred kilobytes after conversion, especially if the original file was exported from a design tool with lossless settings.
That is why JPG is often a better format for:
- blog cover images
- article illustrations without transparency
- marketplace uploads
- email attachments and documentation photos
Quality tips
To keep quality acceptable while reducing size:
- resize before compression when possible
- avoid converting text-heavy graphics to JPG
- preview the output on desktop and mobile
- keep the original PNG as a backup
Better format choices in edge cases
If the goal is smaller files but you still need transparency, WebP may be a better option than JPG. Our comparison of WebP vs PNG for logos and transparent images covers that scenario.
Final recommendation
Convert PNG to JPG when the image behaves more like a photo than a graphic. Keep PNG for transparency, sharp UI captures, and logos. In short: photos go JPG, graphics stay PNG.
If your only goal is a lighter upload, start with one file, compare the result, and then batch the rest once you know the output still looks right.
Related Posts
PDF online in JPG oder PNG umwandeln: Welches Format ist richtig?
Erfahre, wann PDF-Seiten als JPG oder PNG exportiert werden sollten, wie Text lesbar bleibt und wie du die Bilder weiter komprimierst.

How to Convert HEIC to JPG: Complete Guide 2026
Learn how to convert HEIC images from iPhone to JPG format. Step-by-step guide with free online tools, no software installation required.