How to Resize Images for Social Media
How to Resize Images for Social Media
Social platforms do not reward oversized files, random aspect ratios, or text that gets cropped away on mobile. The fastest way to publish cleaner visuals is to resize for the target layout first, then compress and convert if needed.
If you want to do that in one workflow, start with the Image Resizer, then use the Image Compressor or Image Converter for the final export.
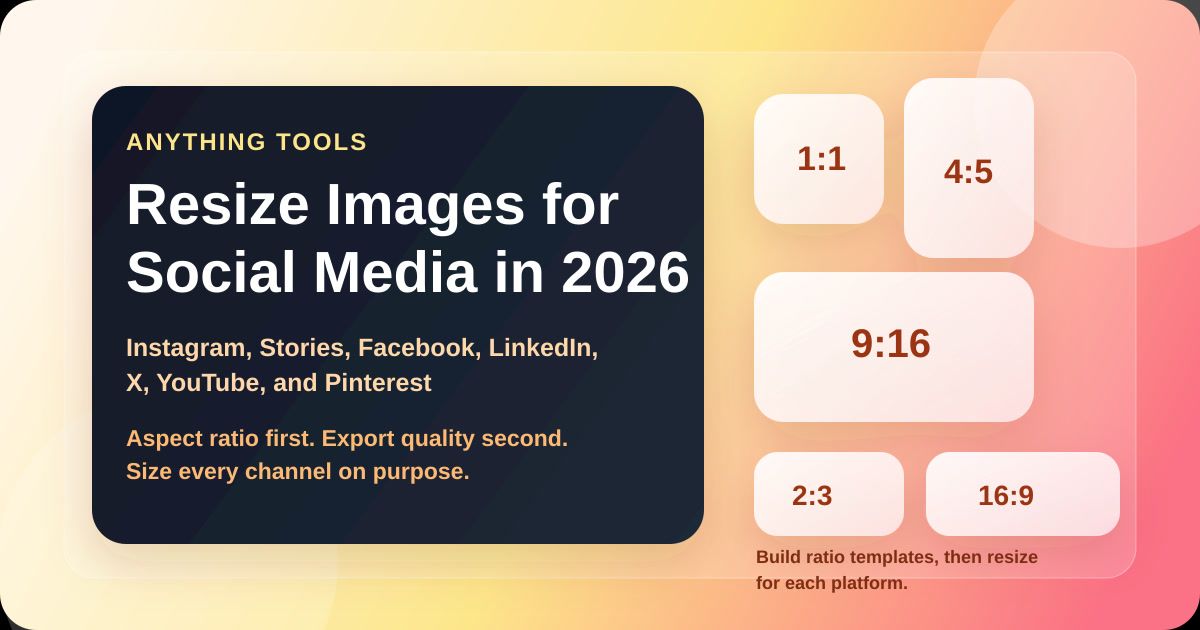
Social media image sizes worth saving
These are safe working sizes for the formats most teams publish every week:
| Platform | Recommended size | Aspect ratio | Best use |
|---|---|---|---|
| Instagram feed portrait | 1080 x 1350 | 4:5 | Standard posts that need more vertical space |
| Instagram square | 1080 x 1080 | 1:1 | Product shots, quotes, simple graphics |
| Stories / Reels cover | 1080 x 1920 | 9:16 | Full-screen mobile content |
| Facebook post | 1200 x 630 | 1.91:1 | Link shares and general feed posts |
| LinkedIn post | 1200 x 627 | 1.91:1 | Company posts and article promotion |
| X post | 1200 x 675 | 16:9 | Landscape graphics and announcements |
| YouTube thumbnail | 1280 x 720 | 16:9 | Video thumbnails |
| Pinterest pin | 1000 x 1500 | 2:3 | Vertical pins and tutorials |
Use this table as a starting point, not a reason to upscale a small image. Resizing down is usually safe. Enlarging a small file often creates blur.
Start with aspect ratio, not pixels
Most social media resizing mistakes happen before export:
- A square design is forced into a vertical post
- Important text sits too close to the edges
- One image is reused everywhere without checking the crop
Pick the aspect ratio first. Then set the final pixel size.
For example:
- choose
4:5for Instagram feed posts - choose
9:16for Stories, Reels, and other full-screen placements - choose
16:9for YouTube and many X graphics - choose
1.91:1for Facebook and LinkedIn link-style visuals
A simple workflow that avoids bad crops
1. Resize the master image
Open the Image Resizer and create one export per platform instead of stretching one file into every layout.
This gives you cleaner control over:
- width and height
- portrait vs landscape framing
- space for headlines, logos, and CTAs
- mobile-safe cropping
2. Keep a safe area for text
Social apps crop previews differently across feed, profile, share, and mobile views. Keep the important content in the center area:
- avoid putting text against the outer 10% to 15% of the canvas
- keep faces, logos, and buttons away from the corners
- leave extra room at the top and bottom for story UI overlays
If a design only works when every pixel is visible, it is too fragile for social distribution.
3. Compress after resizing
Once the dimensions are correct, run the image through the Image Compressor. That reduces upload weight without changing the layout.
This matters because social platforms already re-compress uploads. Starting from a lighter, cleaner file usually gives you a better final result than uploading an oversized original.
Which format should you export?
JPGis still a practical choice for photos and thumbnailsPNGis useful for sharp graphics, interface mockups, and transparent assetsWebPis excellent for web use and internal sharing, but some social publishing tools still convert it before posting
If a platform or workflow rejects your file, use the Image Converter to switch formats before uploading.
Common resizing mistakes
Avoid these if you want sharper posts:
- uploading a 4000px file for a 1080px layout
- exporting a Story graphic as square and letting the app crop it
- enlarging a 600px image to 1200px and expecting it to stay crisp
- adding tiny text that only looks readable on desktop
- using one layout for Instagram, LinkedIn, Pinterest, and YouTube without checking each crop
Best practice for teams and creators
Build 3 to 4 reusable templates around aspect ratios, not platforms:
- square
1:1 - portrait
4:5 - full-screen
9:16 - landscape
16:9
Then resize the final asset for the exact platform output. That is usually faster than redesigning from scratch and far safer than posting one generic canvas everywhere.
Related tools on Anything Tools
If you publish to multiple channels every week, resizing should be part of the content workflow, not a last-minute cleanup step.
Related Posts
So erstellen Sie QR-Codes für Speisekarten und Poster: Ein kompletter Leitfaden
Stärken Sie Ihr Geschäft, indem Sie individuelle QR-Codes für Ihre Speisekarten und Veranstaltungsplakate erstellen. Erfahren Sie, wie Sie im Jahr 2026 sichere und hochwertige QR-Codes generieren.
So verwenden Sie den Groß-/Kleinschreibung-Konverter für eine bessere Inhaltsformatierung
Erfahren Sie, wie Sie Text sofort zwischen Großbuchstaben, Kleinbuchstaben, Titelformat und mehr umwandeln können. Verbessern Sie Ihren Schreibworkflow mit unserem Online-Textkonverter.